Showing posts with label sheet metal. Show all posts

Thursday, March 21, 2013

Meat Pod: The Meatening


With the steel pieces formed, fitted, and clamped together, I tack welded a few spots inside to hold the whole structure together.

Ran out of MIG wire and had to oxyacetylene a few tacks.
Then I applied automotive body-filter putty to the interior to hide some seams, the interior of the outside texture, and the tack welds.


While the Bondo was curing I drilled holes along all the adjacent outer seams.


And started threading copper wire through the holes.


Once the Bondo had set I sanded it roughly and sponged black paint over the whole interior.


Then I glued in the silicone 'meat' I had made to the inside.


And it was ready to display, hanging from water pipes by copper and aluminum braided wire.


Needs more meat.


Meat Pod: In the Beginning

Assignment:  utilize biomorphic and geometric forms to create an abstract sculpture.

I started with a 4' x 10' sheet of 22ga. cold rolled steel from Reliance Steel. Easily the most NEW metal I've ever bought or owned at one time.

Ten feet is hard to photograph.
 Normally I would make patterns to decide what steel to cut, but this time I decided to wing it, in the name of biomorphism. I used the oxy-acetylene torch and cut random shapes.


With a pile of pieces to work from, I went to The Stump.


Using The Stump and a ball-peen hammer I made dents throughout the sheet.


Then I hammered the bumps back down, and as I did the metal started to gather up in areas, creating a unique texture.

I annealed the steel after the first round of hammering, the fire scale is evident.

Once all the pieces were hammered to my satisfaction, I rolled up the edges.


The edges let each piece butt up against another, so they could fit together.


Unfortunately they didn't fit together (it's like some idiot didn't make a pattern beforehand), so each piece had to be tweaked and bent to fit as well as possible to the next.


Wednesday, February 13, 2013

Warka mask Final

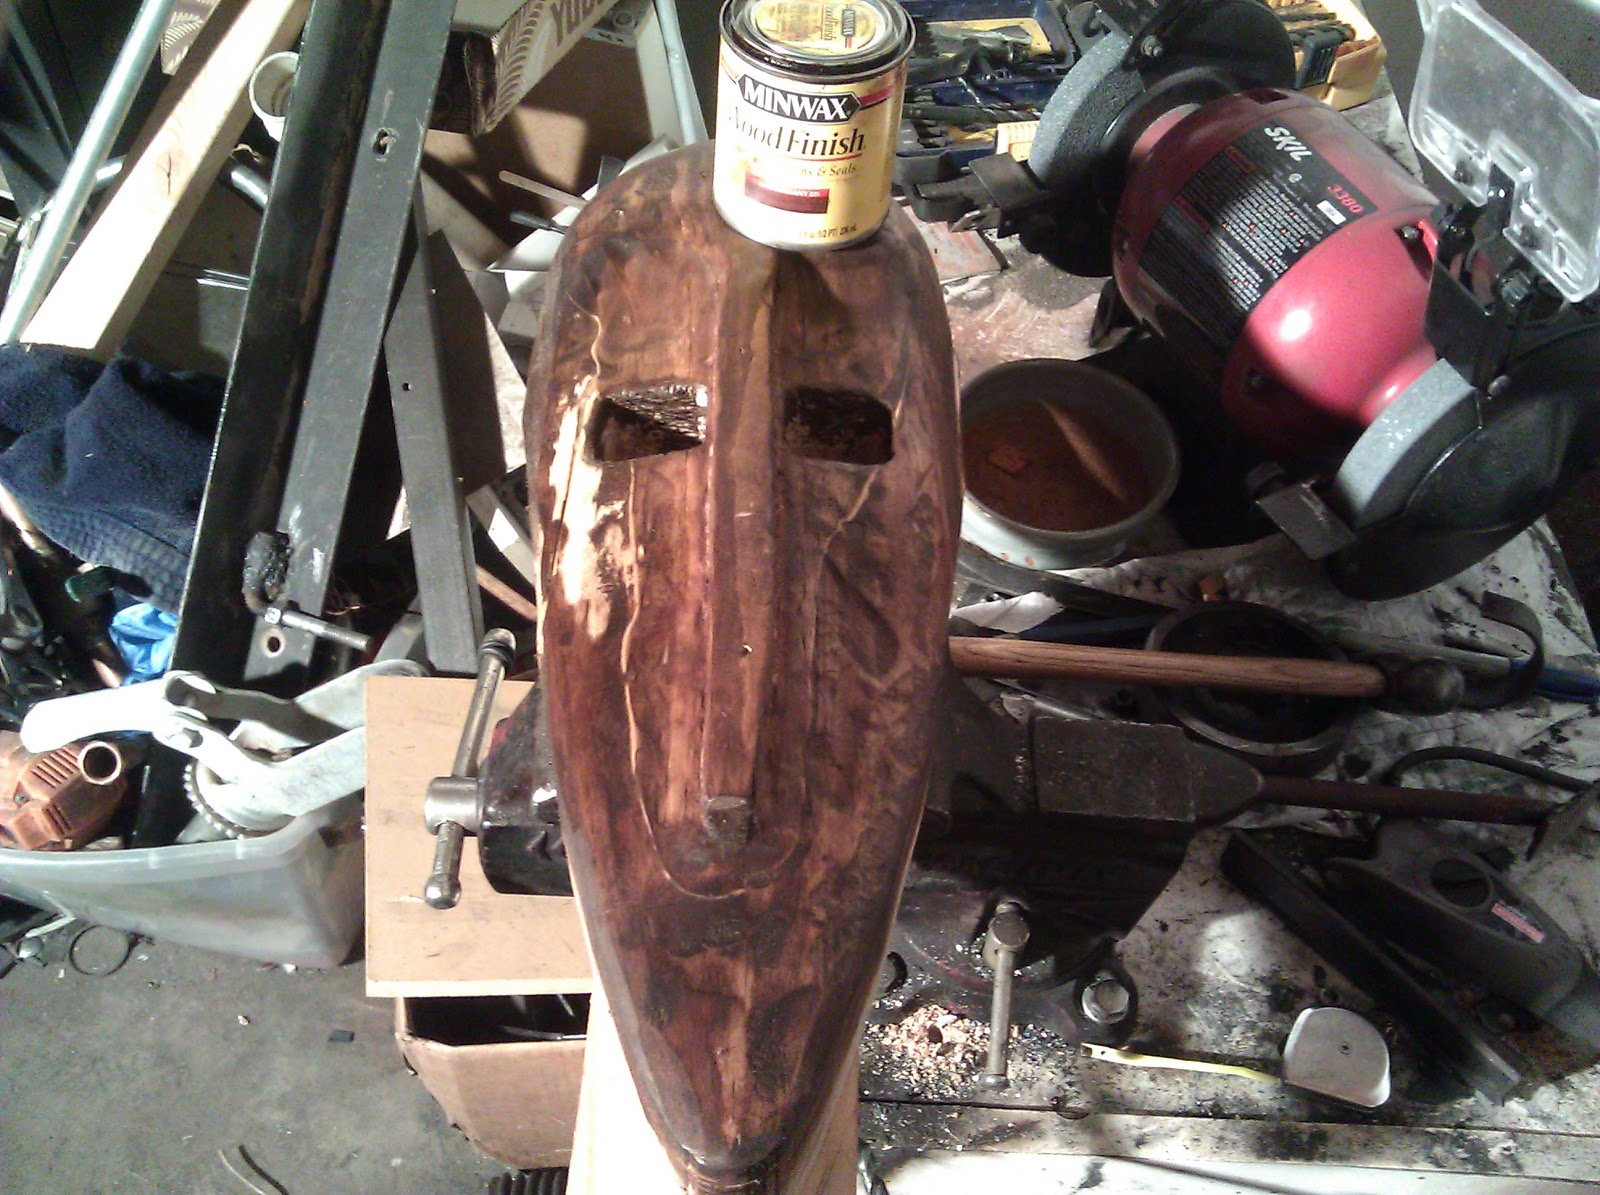
After the copper sheets were shaped and fitted I stained the wood a nice dark color.

After staining
Stained, with copper

Then I raised the details into the copper with a hammer and chasing tools.

The coffee table is a great place for metal working

 To fasten the copper to the wood I made copper nails, by cutting lengths of copper wire and placing them into the vise.


Then gently hammering them down to form a flat head.


The last thing left was a display method, so I made a spear which could stand unsupported (screws to a flat tripod, hidden by sand), the tip has a rounded strip of steel that conforms to the chin of the mask. The mask is held in without fasteners, friction from the pinching strip holds it steady.


Saturday, February 9, 2013

Warka mask III

With all the copper pieces made and fitted, I can start fine tuning the edges, and then putting details in.
Starting to remind me of Odin.


Wednesday, February 6, 2013

Warka mask II

After cutting the shape with a wood grinder, I chiseled the big bumps off and got some finer detail into the nose, and drilled out the eyes and chiseled them as well. Then I made a paper template and cut out one side of the copper for the face, which I began forming over the wood.

When forming metal, remember to anneal it frequently to avoid gardening and work cracks.


The arms sticking out are screwed into the back, and allow me to clamp the whole mass down while I form the copper. Once all the pieces are formed I will begin raising the details and decoration into the copper.

Monday, January 21, 2013

Warka mask

Doing research to recreate an African Warka mask, associated with the people of the Mali area.


They are constructed of hammered metal sheet (usually copper or brass) over carved wood.


Tuesday, August 10, 2010

Cafe racer seat Part I

My current main project is a Yamaha XS400, I'm turning into a cafe racer, or as close as I can get to one. I'm not putting any particular emphasis on period correctness (considering its an 80s Japanese bike meant to emulate 50s British bikes), my focus will be on looks and performance.
A key part of a cafe racer is the seat, there are many different styles, I'm going with a classic butt-stop seat. It has a raised hump at the back to support you under acceleration. I started by making a pattern off of my gas tank, so that the sizing and shape would be at least vaguely similar. I placed a sheet a construction paper against the tank then traced the body lines and cut around them.
I went through several versions of the pattern, adapting them by eye and placing them on the bike until I got the shape I wanted. )If you do this, you'll have to visualize what the flat paper will look like once its been shaped. Its not always easy.) Then I transfer the pattern to my sheet of aluminum. 

And cut it out with tin snips. 

Remember to de-bur the edges of cut sheet metal, they can be extremely dangerous so just running a file over the edges can save you countless adhesive medical strips. 
This is also a good time to correct any errors in cutting you may have made:
You can see here that I left a hard angled corner at one end.

But the file makes short work of the corner.

My next step was to add some strength to the legs, they were very floppy and hard to manage and I was concerned they might get damaged if they were to flexible. So I folded the bottom of each side into a lip by hammering it over a piece of angle iron.
The metal will probably warp a little because you're stretching it every time the hammer strikes, but that can be fixed easily with hand adjustments.