Saturday, December 11, 2010

Update: Seat, Battery Box, Stupification


The seat was a little stiff, obviously, so I got some foam padding at my local sewing shop. It was mildly expensive, at $70 per yard, but don't let them trick you into thinking you have to buy a whole yard, I only got 1/3rd of a yard, and had plenty left over. 
I started by carving it into the same basic footprint as the seat pan.
And then I shaved the corners to start achieving the shape I want.
From there I found that the angle grinder works quite well at shaping the foam quickly and smoothly.
Be VERY careful if you choose to replicate this, as the grinder threw tons of foam dust, probably extremely cancerous, and it definitely sticks to clothing like you wouldn't believe.
After about 45 minutes of careful shaping I got a shape I was happy with.

I may still lower the padding a bit, it's quite tall.

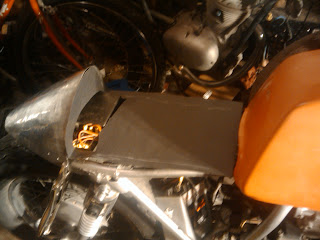
The battery box was constructed of angle steel and steel plate, I think 1/8th inch.

Needs to be surface finished and painted.


Time to rule the world.

Friday, September 24, 2010

Seat Part III

I changed the plan for the seat slightly, and cut off the arms. The hump still needs some finish work, massaging the bumps and wrinkles out.
But now that it's mostly finished, I started on the pan, the actual part which will be padded and sat upon. I started by clamping the hump in place, and making a paper pattern.

I also cut a relief in the middle to clear some of the electronics which are mounted under the seat.
The pattern needed trimming to get close:

Next I transferred the pattern to paper and cut it out:
Notice the electrical tape I placed on the border of the pattern, this extra width will let me fold the pan down to cover the frame and look nicer.
I will cut the relief for the electronics in the metal later.

Kind of looks like a headstone, no?

After some trimming, mocked in place, looks pretty good:


Thursday, September 16, 2010

My garage and the bike

My garage:
You clearly don't need a huge equipped space to make some cool stuff and have fun. Though I should tidy up a bit.
The bike:
1982 Yamaha XS400.
Done so far:
Stripped of all unnecessary body parts and accesories (fenders, turn signals, ugly head and taillights, hideous handlebars)
Replaced gas tank with one from a Suzuki GS450 for better looks.
Modified frame rear of shock mounts.
Mounted electronics under seat.
Begun handmade aluminum bum-stop seat.
New clubman handlebars courtesy of my neighbor Justin.
Oh, and got it running, it had sat for a few years.

Still to do:
Finish seat.
Build battery box.
Hook up hand-controls.
Mount headlight.
Hide unsightly wiring.
New chain and tires also called for.


The new rear frame:


The welds are a little ugly, but its strong enough to stand on and lift the bike by so it's strong enough for me. I drilled and tapped holes in the cross-brackets to mount the electronics.


Also, my other bike project, on the back-burner currently as it needs way more work. The 1966 Benelli 125:


Tuesday, August 10, 2010

Cafe racer seat Part II

Now I'm ready to start shaping the seat. I'll use a mandrel to bend the sheet to a starting radius which is hopefully close to my final goal.
It turns out my leg is just about the right shape.

You can see the metal is curved, but only in one direction. 

It still looks flat in profile view. I want what is called a compound curve, which means it curves in two directions. To achieve this I'll use my planishing hammer, an air hammer which strikes the metal over a rounded die, some of which you see here.

The more rounded the die to the more shape you'll beat into the metal. One quick round with the hammer and the seat had tons of shape.

But stretching the middle creates a wavy, bacon-like effect on the edge, so I need to shrink the edge to keep it smooth. You can see here that the right side has not been shrinked and remains wavy, while the left side has been and has a nice curve to it.

After more hammer shaping, notice how the top middle has started extending further than the sides, compare to pic above, this is because I'm stretching the metal just behind that area (to the right in the picture) and the metal has to expand somewhere. This isn't a serious problem, it can be trimmed later, but it does illustrate one of the dangers of over-stretching:

Now that the set has the shape I want, I'll start making the framework which will keep it sturdy enough to sit on and allow me to attach it to the bike. I'm making frame rails out of 1 inch angle aluminum.

I'll be attaching these with pop rivets so I drill rivet holes about every inch, trying (but not totally succeeding) to keep them level and perfectly spaced.
Then transfer the holes to the seat legs:
Ready to be attached!

Cafe racer seat Part I

My current main project is a Yamaha XS400, I'm turning into a cafe racer, or as close as I can get to one. I'm not putting any particular emphasis on period correctness (considering its an 80s Japanese bike meant to emulate 50s British bikes), my focus will be on looks and performance.
A key part of a cafe racer is the seat, there are many different styles, I'm going with a classic butt-stop seat. It has a raised hump at the back to support you under acceleration. I started by making a pattern off of my gas tank, so that the sizing and shape would be at least vaguely similar. I placed a sheet a construction paper against the tank then traced the body lines and cut around them.
I went through several versions of the pattern, adapting them by eye and placing them on the bike until I got the shape I wanted. )If you do this, you'll have to visualize what the flat paper will look like once its been shaped. Its not always easy.) Then I transfer the pattern to my sheet of aluminum. 

And cut it out with tin snips

Remember to de-bur the edges of cut sheet metal, they can be extremely dangerous so just running a file over the edges can save you countless adhesive medical strips. 
This is also a good time to correct any errors in cutting you may have made:
You can see here that I left a hard angled corner at one end.

But the file makes short work of the corner.

My next step was to add some strength to the legs, they were very floppy and hard to manage and I was concerned they might get damaged if they were to flexible. So I folded the bottom of each side into a lip by hammering it over a piece of angle iron.
The metal will probably warp a little because you're stretching it every time the hammer strikes, but that can be fixed easily with hand adjustments.


Thursday, August 5, 2010

Greetings Starfighters

Oh Ma, look! I'm gonna be a blogger!
I figured I needed a place to post any projects I work on, I have several running at the same time usually. I'm kind of a hack, still learning how to do stuff right, if you know a better way to do something, its probably too late for me, but shout it out anyway. Most of my projects will involve metal working, hopefully someone can learn and/or teach me and we can all make some cool shit. I feel a bit silly knowing that absolutely no one is going to read this for a while yet.
Hi mom!